Monday, February 26, 2018

Our River House Fixer Upper - Week 45 Part 2

I used my day off yesterday to re-do a piece of furniture.   We got this dresser last spring when we needed something for the captain's clothes.  Wasn't very attractive, but solid wood and reasonably priced.  Now the captain has a really nice dresser (got about a week ago and it is NICE!!), so we had to do something with this one.


See...not very attractive, but functional.   At first, we thought about placing it upstairs, but then I thought why not keep it downstairs in the hallway and use it for storing linens.  We talked it over and decided if I could transform it then we would  use the dresser downstairs.  

So I spent yesterday making it look a little better.  

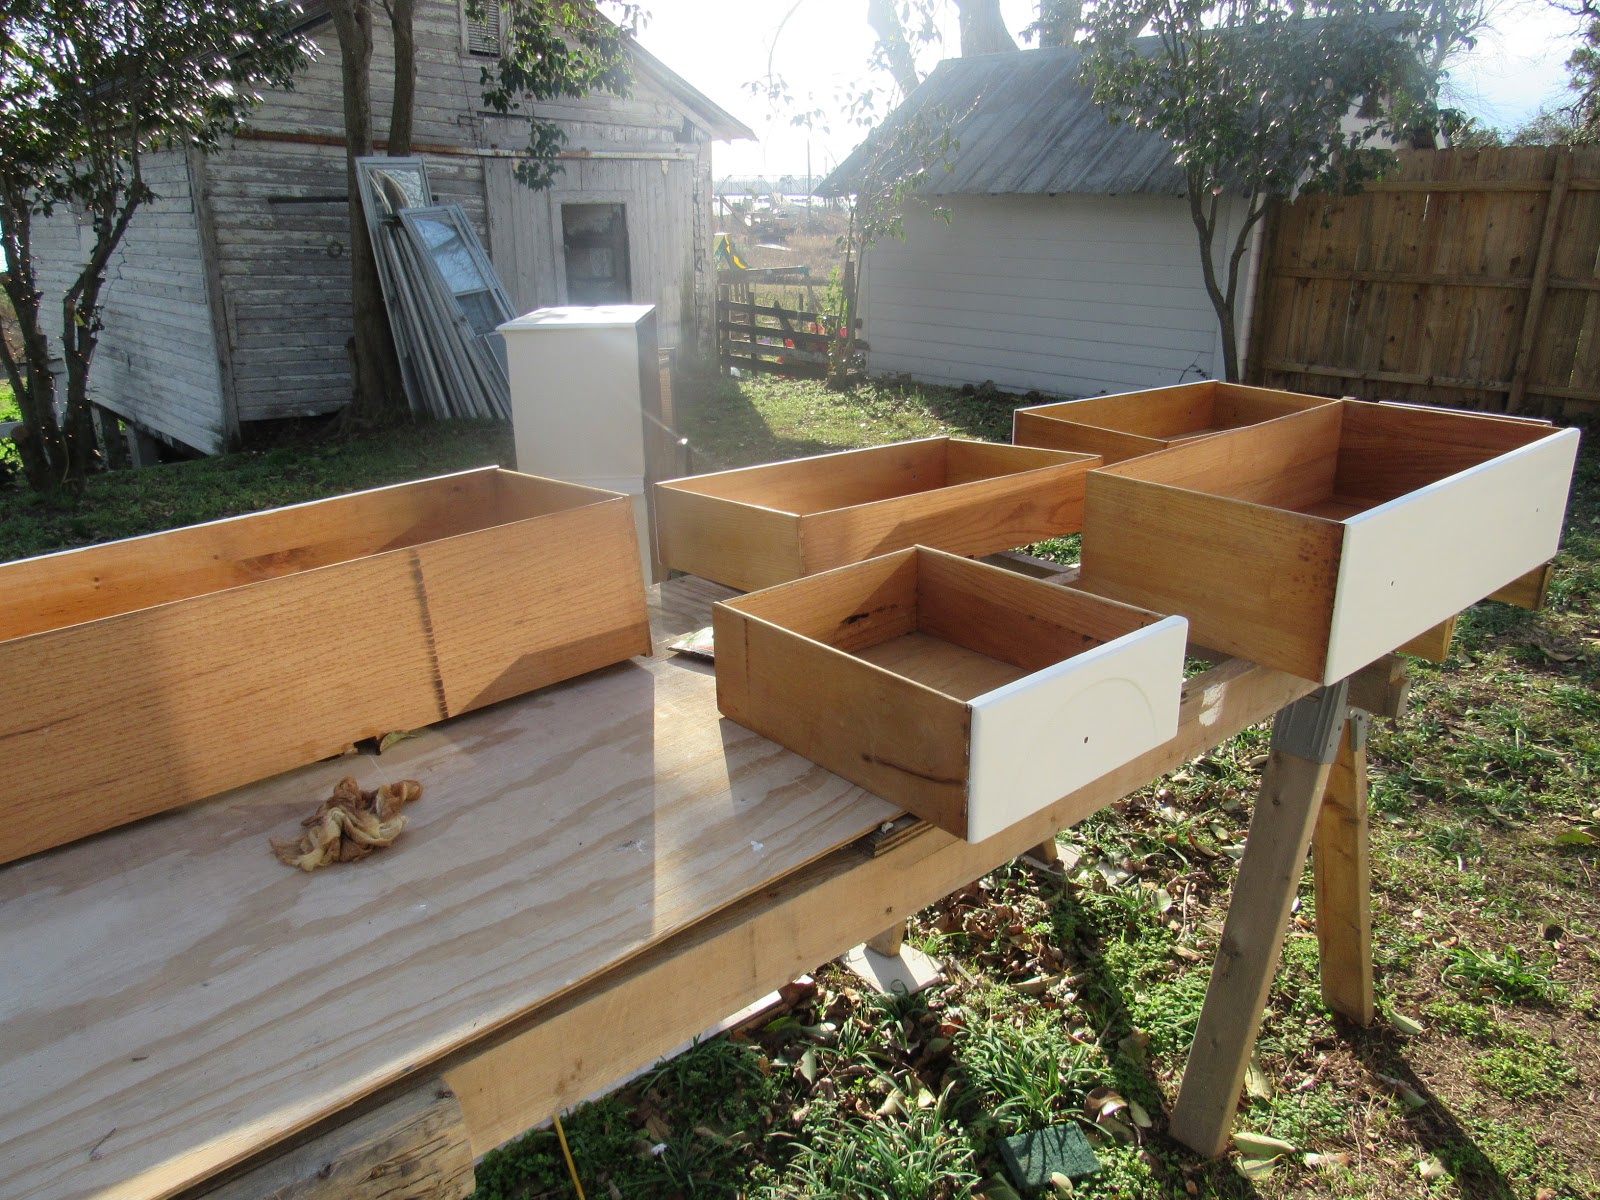
I started by sanding the entire piece.  Have I mentioned before that I hate sanding?


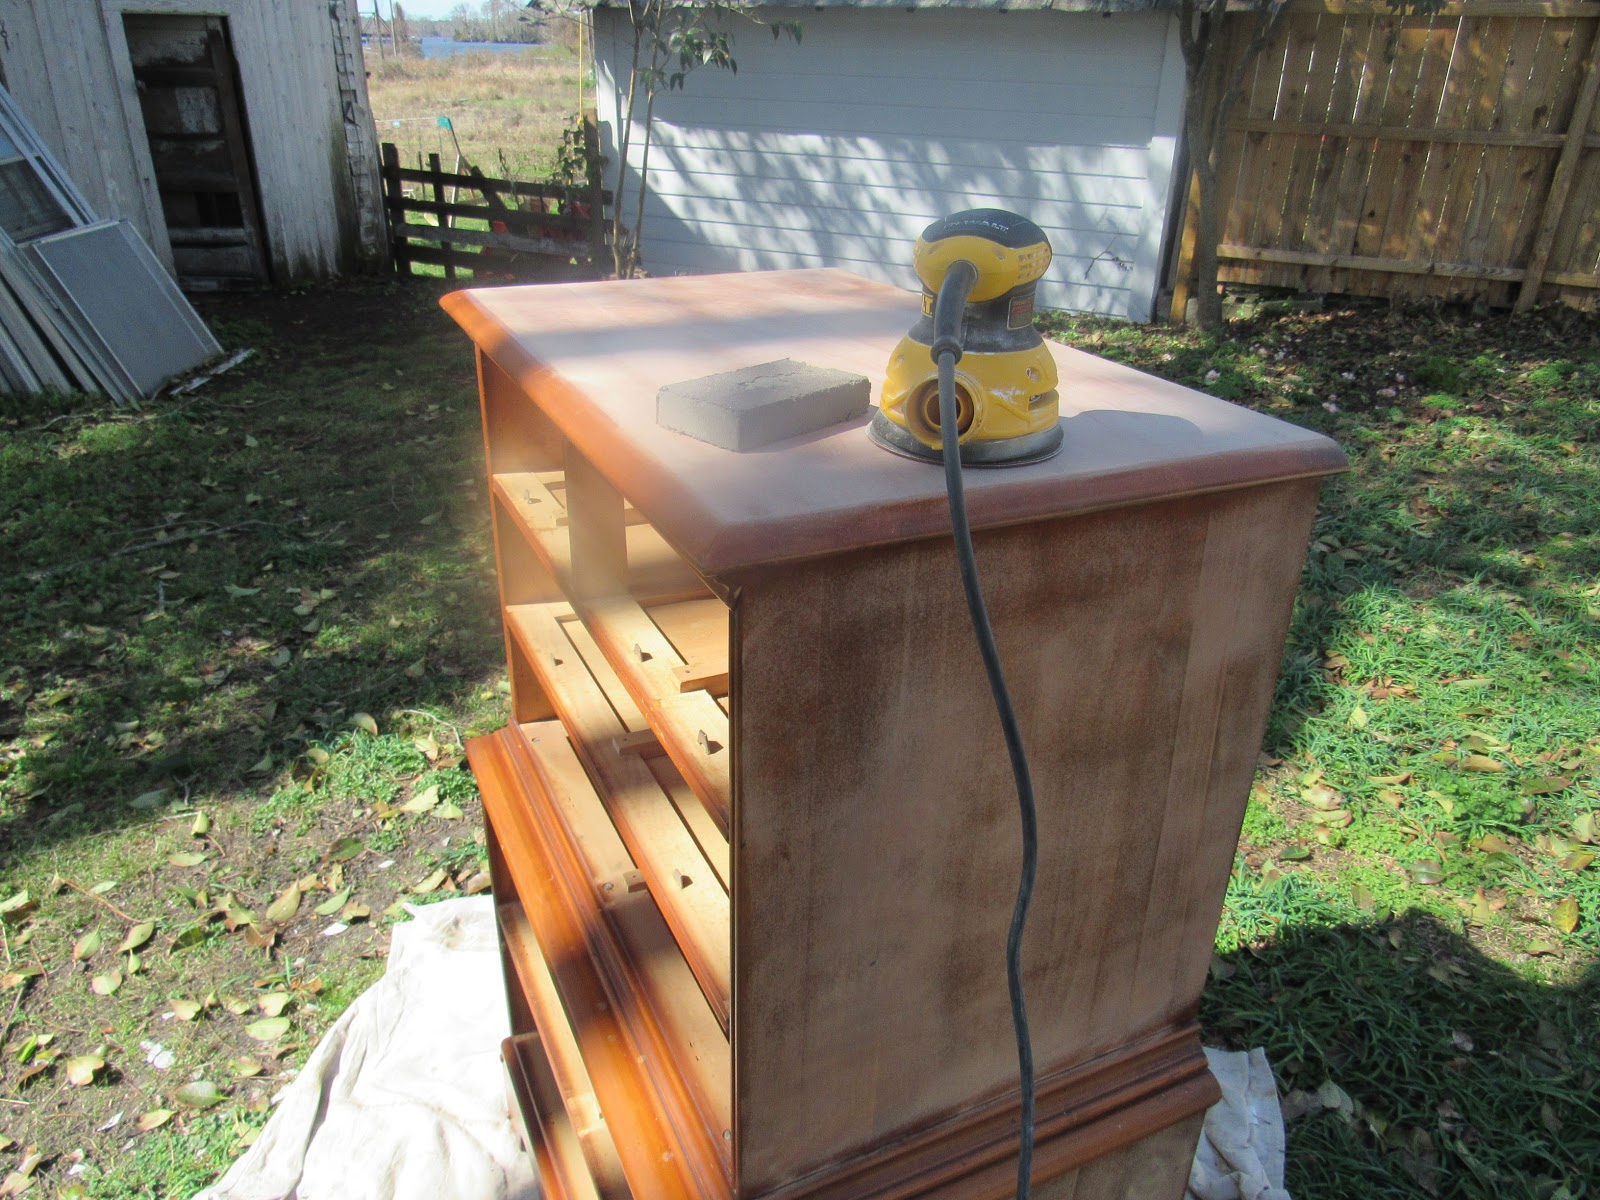
After wiping off all of the dust, I covered it with two coats of Kilz primer.


It was such a pretty day, it did not take long to dry between coats.  While drying, I went to Lowes in search of a pretty color to go on the dresser.  I opted for Onion Peel.  Food colors speak to me 😉  I painted another two coats of satin latex in my picked color.  Only bought a quart and I have over half of can left to use for something else.


While waiting for that to dry, I enjoyed watching an eagle flying around overhead.  Tried to capture him in a good pic, but he was not cooperating with me.  This was the best I could get of him flying really close in our backyard.


We had these pretty glass drawer pulls that were included as a extra set with the captain's really nice dresser.   Decided they would work nicely on this dresser. 


Only had eight of these, and I needed ten.  So while at Lowe's, I picked up two different glass drawer pulls out of the mark down bin, for $2 each.  


Added the drawer pulls and then went to work on distressing the dresser.  I have never done this before and did not want it too distressed, just a little bit.  


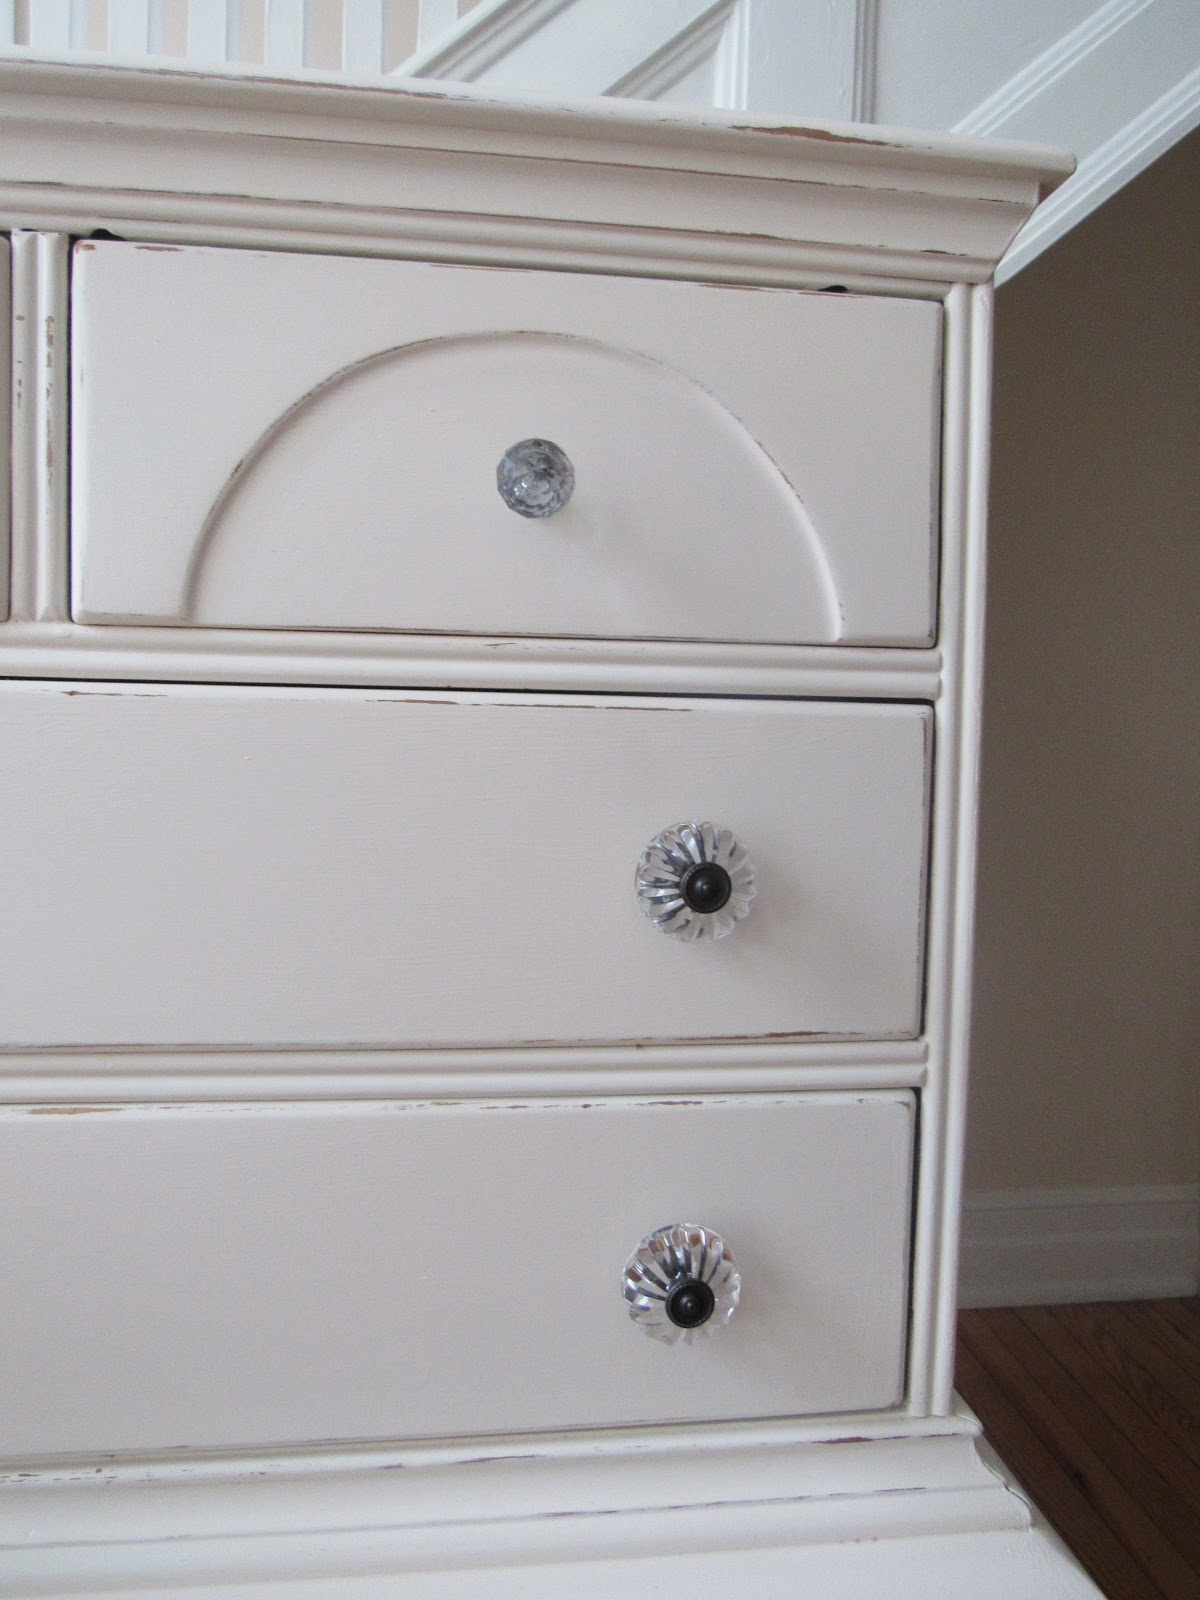
And this is how it turned out.


Before pic...


After pic...


Not to bad for a leftover dresser and a day of re-do.  Now we have extra storage in our hallway.


Until next time...


Enjoy!

Sunday, February 25, 2018

Our River House Fixer Upper - Week 45

House update for the last two weeks?  Well...we haven't worked on the house is the update 😐.  The weather has been too nice for the captain to be inside working on the house, so he is working on the boat.  SunDaze...our home on the water is in serious need of some TLC, and he is taking advantage of our beautiful weather to get some projects done while the boat is in the yard at the marina.  


So back to the house.  We did do a dresser redo over the past week.   We love our home, but one thing lacking in this house is storage.  Only one closet in the entire house.  I really need a dresser, and we have been furniture looking, but find most of the stores have crappy furniture with hefty prices.  Unless you get craftsman furniture made by real people rather than assembly lined warehouse stuff, the furniture usually made with particle board and sometimes even stapled together!  So when we have time, we have been trying to stop in vintage or antique stores, or thrift shops and garage sales.  

On our trip to my daughter's house a couple of weeks ago, we stopped at a antique store and spotted this dresser.  And the price was right!  It was marked at $160.00, with a green sticker on it, indicating it could be had at a reduced price.  Got it for $125.00.  Solid wood!  The finish was a bit lighter than we wanted but my captain told me he could fix that. 

So we brought it home and he went to work.  First step...sanding (I hate sanding!!!)


Next...coat of Minwax poly stain.  


And another coat.


Once it was dried enough to touch lightly, we carried it inside to cure overnight ( did not want to leave it on the porch during the night).

And it is done.  


We purchased the mirror a while ago from a mark down bin in Lowe's.  So got it out of storage and the captain hung it above the dresser.

Looks great!!!  And now I have some much needed drawer space.  Woo Hoo!

Until next time...

Enjoy!


Wednesday, February 21, 2018

Spring Planter Project


Since it was simply grand to be outside today, I decided to tackle a small diy project.  I saw this planter idea on Pinterest so I went to work on recycling some 5 gallon buckets we had leftover from working on the house.  


I wanted black planters, not blue.  So I sanded them lightly with sand paper.  (also left over from sanding trim in this house!!)


I used Krylon spray paint (stated could be used on plastic) in matte black.


Took about 30-45 minutes to dry completely.  Then I added a bit of trim just under the top lip of the bucket.  Used my hot glue gun and should have used a thicker jute but I did not have it.  So I went with what I had on hand.


Then off to Lowe's to get some plants.  Now I realize that just because it is gorgeous outside today, I know it is not yet officially spring.   So I chose some cool hardy plants...

Arugula, curly kale, rosemary and parsley.  Well parsley may not weather a frost/freeze but I got it anyway.

I had three buckets/planters.  I filled two with the new plants, and the other one with my sky pencil japanese holly that I am trying to save.  It was in a smaller planter on the front porch during the holidays and it is not doing very well right now.


I gave them a good sprinkling of water and ... there they are.  The greens should fill in nicely, and once they are harvested, I will be able to replace with something that will handle the warmer days ahead.  

Not too bad for left over buckets!

Until next time...

Enjoy!


Spring?


This is what I found outside our back door this morning.  I realize it is still February, but what a beautiful day today!  Too nice to stay inside.  So I didn't.  


One of our bushes/trees is budding and a few blooms have opened up.  I think it may be a camellia shrub and it is loaded with flower buds.  


In our front yard, the hydrangea bush is thinking it may be time to come out of hibernation. 


Certainly hope we are not being tricked by mother nature...would not want these beauties to get nipped by ole man winter!  

Sunday, February 11, 2018

My "Hide the Electrical Panel" Project

Our electrical panel is located in the kitchen and was very visible and unattractive.  During our renovations, I kept thinking we were going to have to find some way to disguise the panel without compromising quick accessibility.


I wanted a chalk board in our kitchen and thought that space would be a good place to hang a chalk board and cover the electrical panel too.  I had an old painting so I went to work.  First, I removed the old painting from the frame.


Then I cleaned and painted the frame.  


Next, I got the captain to cut my chalk board to fit the frame and he epoxied it in place.


Then the captain built a frame and cover to go over the electrical panel. I painted it the same as our wall color to blend in and make it less noticeable.  The captain used extra strong magnets to hold the cover in place.  Once the paint dried, he then screwed the chalkboard onto the cover and....


...the electrical panel is covered with our handmade chalk board.  If we need to get to the electrical panel, all we have to do is hold both sides of the frame and pull slightly to remove the whole panel and there it is.   Easy...peasy... 


I drew some hearts on the board to let my captain know how much I appreciate his handyman efforts.  And it is Valentine's Week!


Until next time...

Enjoy!

Our River House Fixer Upper - Week 43

Well, I wish I could say the master bath is finished, but I can't.  We ran into a snag.  The snag is the bathroom vanity.  We bought these pieces last May (huge sale on the set of 3) thinking they would work in our master bathroom once we got around to working on it.  


As you can see from the picture, they are not in the bathroom, instead we have them in the living room.  We were going to place the smaller piece between the two larger pieces to make it look like one large vanity with two sinks. Unfortunately it is not going to work for us.  Nothing in this house is square or level (it is an old house).  The three pieces should butt together without gaps or unevenness.  But it doesn't.  And it just does not look right. 

This is the spot in the bathroom where our vanity needs to go.  Trust me, we have tried to figure a way to get these pieces to fit.   But it doesn't without looking like a botched up job.   Oh well,  a boo boo on our part, and a bit of a costly one.   Hopefully we can sell them on Craigslist.  😟


We are now looking for a 60 inch one piece vanity that has double sinks.  We need a free standing one, due to the existing heating/cooling vent in the bathroom.  And as you would know it...I can't find one that both the captain and I like.  Lots of beautiful cabinets out there, just haven't found one that we both can say...that's it.  Maybe we are too picky.  The captain told me to leave it alone for a while.  So I am.   However, the toilet and bathtub are in working order.  Nice to be able to enjoy a hot bath after working long hours!


And the light fixtures are installed.  


We have been working on this house for some time now, and this is our first "oh, well we did not think that out too well" mistake.  Hopefully there is someone out there that can use those three pieces.  We really liked the style, but the fit just doesn't work in the space.  Oh well...


Until next time...

Enjoy!